DIY Fireplace Makeover Home Decorating Project
Transform your Fireplace with just one Stencil. We will show you how.

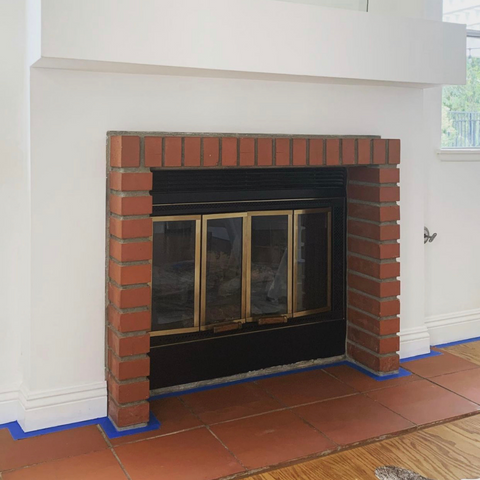
This is Claudia's fireplace makeover - All Photos are credited to Claudia - Instagram - @claudbank
STEP 1 - MEASURE YOUR TILES & CHOOSE YOUR TILE STENCIL
To start with measure your tiles so that you buy the correct sized stencil. When you measure, do not include the grout. If we don't have your exact size then simply buy the tile size that is slightly bigger and add a note to your order informing us the correct size of your tile, so that we can re-size the design for you so that it fits perfectly. See our guide on how to measure your tiles.

Claudia used the Chippenham Tile Stencil.

We have loads of designs for you to choose from. See our full Tile Stencil Collection here.

STEP 2 - PRIMER
Claudia started by masking off around the fireplace and then painted the tiles with primer first. Allowed this to dry, then painted 2 coats of white Rustoleum Chalk Paint. Once all this was dry it was time to start stenciling.
STEP 3 - STENCIL
Claudia started painting every other tile to begin with to allow the paint to dry before completing the tiles in between. This helps prevent you from smudging the paint.

Claudia was then able to paint the other tiles in between. Remember to always blot the roller on old newspaper or paper towel before stenciling to remove any excess paint. It's the excess paint that causes bleeding underneath the stencil.

This just left the awkward shaped tiles next to the wall. Having a second stencil at this point is really helpful so that you can cut it to fit any awkward corners and spaces.

STEP 4 - SEALER
Once the stenciling was complete it was left to dry and then finished off with a sealer, just to give it added protection.

So what do you think? Quite a transformation isn't it? Such a budget money saving makeover, just using a stencil and some paint!


 |
 |
 |
 |
 |
 |
 |
 |