Let's Stencil a Cushion Cover
Updating soft furnishings with stencils is quick and easy, watch our Stutorial to see how we transform a plain cushion cover with The Stencil Studio Indian Star Stencil in just a few minutes..
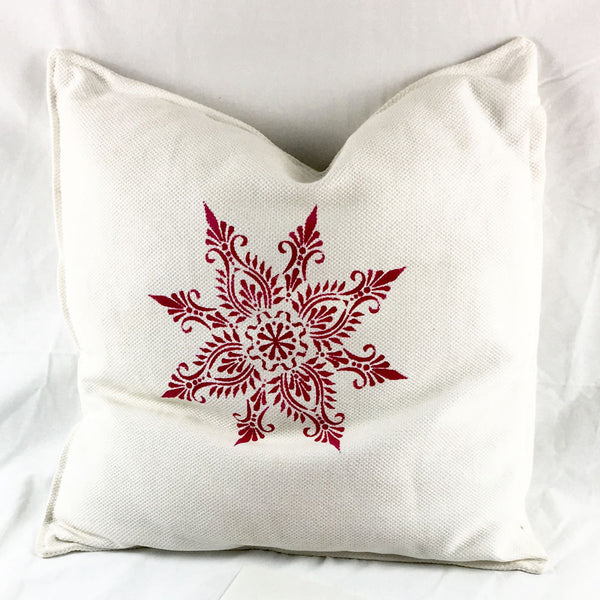
Cushion cover with The Stencil Studio Indian Star Stencil - Size M
You'll need:
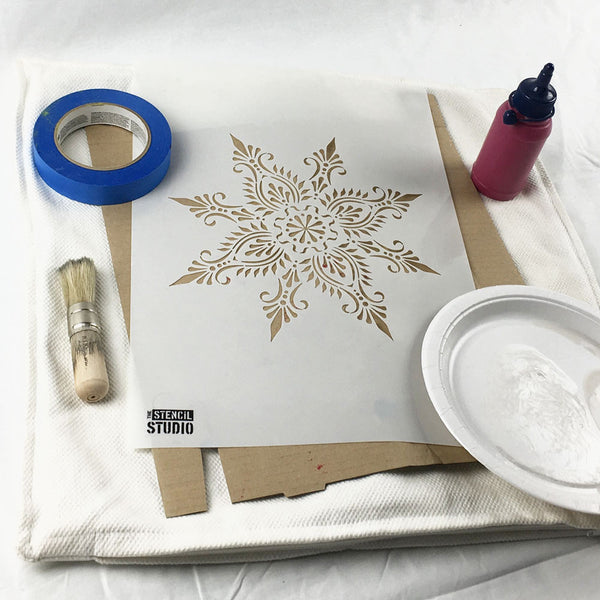
Cushion Cover
Any plain coloured cushion cover is suitable, you can even stencil textured fabrics, it may be better to choose a large simple stencil. Smooth fabrics are ideal for more detailed stencils.
Stencil
Choose a stencil you like and one which will fit the size of your cushion cover. In this tutorial we've used our Indian Star stencil - size M/A3. All of our stencils are washable and reusable. You can turn the stencil over to reverse the pattern too.
Fabric Paint
Choose a really good thick fabric paint. Fabric paints have the addition of fabric medium, a type of glue which bonds the paint to the fabric when heat set with an iron. Just follow the directions on the container. Heat setting allows you to wash the fabric
Stencil Brush
Stencil brushes have a flat end allowing for close contact to the fabric through the stencil. Always keep the brush at a 90 degree angle to the stencil to avoid paint getting below the stencil. You could also use a dense foam paint roller but for small one off projects like this a brush is far more convenient. We used The Stencil Studio Medium Stencil Brush. See our Stencil Brushes here.
Spraymount and/or masking tape
Spraymount is a repositionable spray adhesive. Spray the back of the stencil. Once the glue has dried you'll be able to stick the stencil in place. Alternatively, use masking tape to secure the stencil whilst you paint it.
Paper Plate
Or other recepticle for holding the paint. You'll need a dry area to rub the brush in before painting.
Piece of card
For inserting inside the cushion cover. Any old card will do, we've used part of a pizza box! This gives you a firm surface to stencil to and also stops paint bleeding through the fabric to layers beneath.
Method:
Insert the card inside the cushion cover.

Pour a little paint onto the paper plate. Spray the back of the stencil with spraymount and leave until dry, the glue will feel tacky but will not transfer to your fingers when touched.
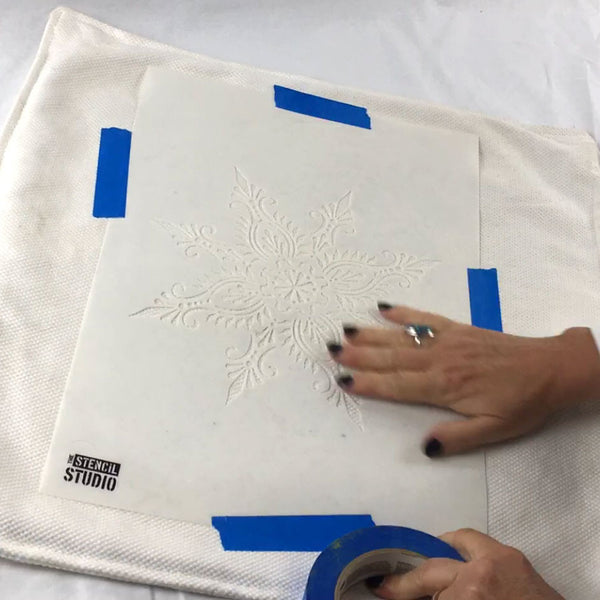
Stick the stencil in place. Take a little paint onto the tip of the stencil brush.

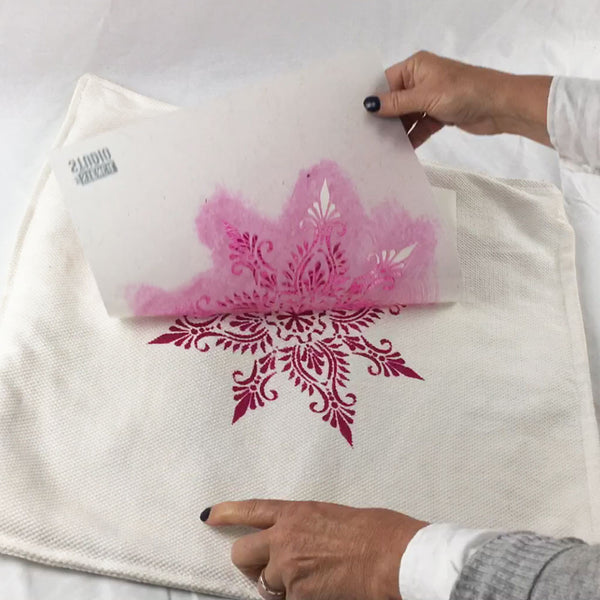
Dab and swirl the brush onto a dry area of the plate to distribute the paint and remove excess.
Begin dabbing paint onto the stencil, moving the brush in a dabbing and/or swirling motion. Continue stencilling and only adding the bare minimum of paint to the brush when necessary.

When you have completed the painting, remove the stencil.
Once the paint has dried completely, follow manufacturers instructions to heat set the paint. This usually involves ironing for a minute or two. Now you'll be able to wash the fabric without losing paint!


See more Stutorials here.
Look at The Stencil Studio's Indian Star Stencil