Stenciling existing floor tiles is an affordable alternative to replacing your bathroom floor. 

Meet Alex who recently transformed her bathroom floor using Rust-Oleum floor paint and our Rissington Tile Stencil.

We will show you how she created this amazing transformation. 

The Stenciled Bathroom Floor


All Photos are credited to Alex - Instagram - @everyday_styled 


Before and After Stenciled Bathroom Floor


STEP 1 - PREP THE SURFACE:
Remove any caulk you may have around the floor edge and clean the floor thoroughly. Recommend using a good cleaner / de-greaser to really make sure you are getting all the grease and grime off the tiles.
Then apply masking tape around the edges of the room where the wall meets the floor plus anywhere else that you don't want to paint such as the bath. 
The floor needs to be clean and dry before you can start painting. 


STEP 2 - APPLY BASE COAT:

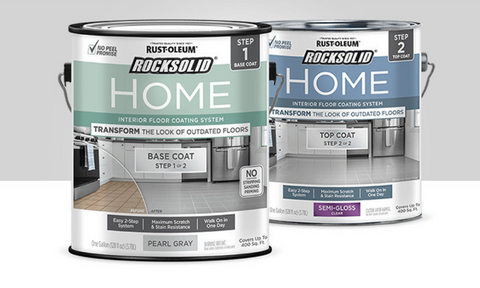
Rust-Oleum have brought out a range of paint that is extremely durable, easy to use, and allows you to paint your tiled floors without stripping, sanding, or priming them first.  It is not only suitable for ceramic tile floors but also porcelain tiles, concrete, hardwood, laminate, vinyl, and more. Rust-Oleum Home floor paint set which includes a base and a top coat for your floors. 

Paint Used

Top Tip: Rust-Oleum recommend that you should test your floor for adhesion, to check that it doesn't need sanding first before applying the base coat. They suggest that you apply the base coat to a small area (approx 3in x 3in) in an inconspicuous area of the room and allow it to dry for 12 hours. Then, taking a knife, scratch an X in the coating. Then apply a piece of duct tape over the X and press down firmly.  Remove the tape with one quick pull, if more than 10% of the coating comes off then the floor will need to be sanded before the base coat is applied. Rust-Oleum recommend using 60-80 grit sand paper. This may sound like a faff but it's worth doing just for reassurance!

Start by painting the base coat around the masked off edges of the room where it is difficult to paint with a roller.  Then use a roller (Recommend a 3/8 inch nap paint roller) to apply the base coat over the entire floor, working in sections as you paint yourself out of the room.  

Top Tip: This base coat is the most important. Let this dry for 6 hours before doing anything else.

Most base coat colours only require one coat but Rust-Oleum recommend two coats if you are using the white base coat. 

Applying the Base Coat


Top Tip: Wear socks between coats to prevent leaving footprints or dust on the paint.


STEP 3 - STENCIL
Alex used the Rissington Tile Stencil for this project
Rissington Tile Stencil
We have many other stencil designs to choose from.
Tile Stencil Collection
Alex made sure that the stencil was the right size to fit her existing tiles, so the pattern was only separated by the existing grout lines.  If you need help then check out our blog that shows you how to measure your tiles and buy the right size tile stencil.
How to Measure your Tiles Guide
Top Tip: It's a good idea to test out colour combinations before you start so you are happy with the way it will look. Alex did this on bits of cardboard so she could see how the colours would work.
 

Testing colours with the Stencil 

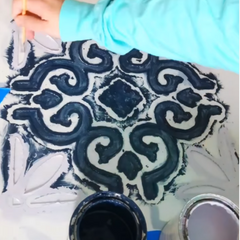
When you are happy with your colour combination it's time to start stenciling. Fix the stencil in place with masking tape before you start painting. Alex used a small paint brush to paint the separate colours of her stencil design.  It might have been quicker for her to have had two stencils. One for each colour. Have the different coloured areas masked off and use a paint roller to apply each colour separately.  

Apply paint through the Stencil

Top Tip: Always remove excess paint from your roller / brush before stenciling. Best to dab the roller / brush onto some kitchen paper or old newspaper to take off the excess paint. You never want to overload your brush / roller with too much paint as this causes the paint to bleed under the stencil. 

A thick application of paint will bleed under the stencil, so its best to do thin coats that will give you nice clean lines. 

Stencil the existing tiles
Top Tip: Start stenciling the whole tiles on the far edge of the room and work towards the door. 

Stenciling the existing tiles
Alex used regular wall paint for the actual stenciling. She decided that having regular wall paint between the base coat and the top would be fine. So far (since Autumn 2021) it has held up really well.
 

In order to prevent the painted tiles from being smudged it is best to stencil every other tile, then once the paint is dry you can stencil the in between tiles. Remove the stencil whist the paint is wet and move onto the next tile. You could always use a hair drier to help speed up the drying time.  

Stenciling Tiles


Once you have stenciled all the complete tiles it's time to move onto the edges and tricky areas. Bend the stencil and use masking tape to hold the stencil in place as it's bent up the wall. 
Top Tip: Having a second stencil that you can cut to fit tricky corners is a good idea. Plan carefully before you start cutting your stencil, doing the largest areas first and work your way down to smaller areas that you need to stencil.  


Stenciling Tiles


TOP TIP: Once you have completed your stenciling go round with a tiny paint brush and touch up any little mistakes.  This step is what really helps make your floor look professional.


STEP 4 - TOP COAT
When you are happy with your stenciled masterpiece its time to apply the top coat. Alex used the Rust-Oleum floor paint top coat. Its best to apply this with a 1/4 nap paint roller and paint brush for the edges. 
Only one coat of top coat is required. If a second coat is desired for additional durability, wait until the first coat is dry to the touch (about 1-2 hours) before applying with a new paint roller.  Apply the second coat within 24 hours.


Apply a Protective Top Coat

Top Tip: Allow the top coat to dry for 24 hours before any light foot traffic. Allow 72 hours before replacing furniture (and avoid dragging it on the floor). The floor will be ready for full use and fully cured after 7 days. You can then wash it using a non-abrasive general purpose cleaner. 

Don't you agree that Alex did an amazing transformation. Simply by using paint and a stencil you can create a custom tile look without the custom tile price tag!

The Stenciled Bathroom Floor

The Stenciled Bathroom Floor


The Stenciled Bathroom Floor

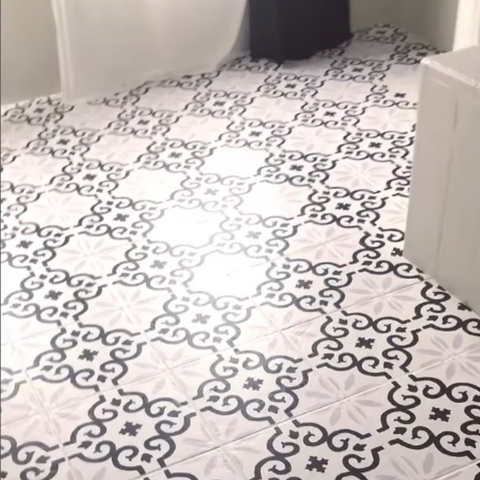
Lets just remind ourselves of how it looked before so we can see the drastic transformation.  We think its amazing. 

Before the Transformation  

We think it's pretty amazing that with one tile stencil you can transform the look of a whole room. An amazing transformation. 

All Photos are credited to Alex - Instagram - @everyday_styled 

  • See our full stencil collection here - Buy Stencils online (We ship worldwide).
  • Follow us on Pinterest, Instagram and Facebook for more inspiration, stenciling fun and ideas.
  • Share your own stenciling projects with us on Instagram or Facebook. We love to see your work. 

Please feel free to comment below and share this post.

Comments

Rev Ann Purdie

Rev Ann Purdie said:

Absolutely gorgeous; I am going to TRY to do my bathroom; wish me luck

Leave a comment

Please note: comments must be approved before they are published.

Back to the top